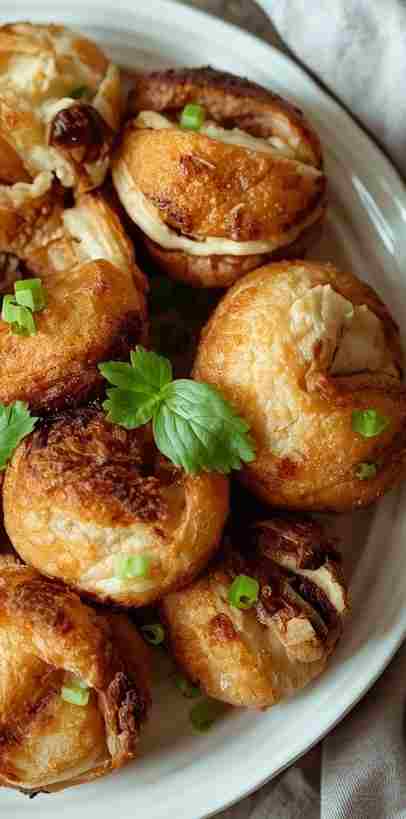
Easy Chicken Parmesan Recipe https://asimplepalate.com/blog/chicken-parmigiana/
The first time I made chicken parmesan for a catering event, I was so confident
I had this big wedding booked, eighty people, and chicken parmesan was the main course
I thought I had it figured out
I breaded all those cutlets, fried them up golden brown, layered on the sauce and cheese, and slid them into the oven
Everything looked perfect
The cheese was bubbly and brown, the sauce was rich and red, the chicken looked beautiful
But when I started serving, I realized something was terribly wrong
The crust had turned into this soft, gummy layer that just slid right off the chicken
The sauce had separated into this watery mess that pooled at the bottom of the plate
And the chicken inside was dry
Like really dry
I served eighty plates of disappointing chicken parmesan that day
I smiled through the whole thing
People complimented me and pretended it was good
But I knew
And the bride’s mother definitely knew
She gave me that look
You know the look
The one that says “I paid you money for this and I’m not happy”
That night I went home and I didn’t sleep
I just sat in my kitchen staring at my stove thinking about what went wrong
I spent the next few weeks testing everything
I must have made chicken parmesan fifty times
My neighbors probably thought I was crazy
But I was determined to figure it out
And eventually I did
So let me walk you through everything I learned
All the failures, all the experiments, all the small tweaks that turned this dish from something I dreaded making into something I actually enjoy
This is going to be long because I want you to understand not just what to do but why you’re doing it
Because when you understand the why, you can fix things when they go wrong
And they will go wrong sometimes
That’s just cooking
The Thing Nobody Tells You About Chicken Parmesan
Here’s the truth
Chicken parmesan is actually three different dishes pretending to be one
You have crispy fried chicken
You have tomato sauce
And you have melted cheese
Each one is simple on its own
But when you put them together, they start fighting
The sauce wants to make the breading wet
The cheese wants to slide off
The chicken wants to dry out
You’re basically trying to keep peace between three enemies
And if you don’t know how to manage them, you lose
Most people think chicken parmesan is just breaded chicken with sauce and cheese
And technically that’s what it is
But the way those three elements interact is where everything falls apart
The breading is porous
It absorbs moisture
And sauce is full of moisture
So when sauce touches breading, the breading gets soft
It’s just physics
No amount of cooking skill can change that
But you can work around it
You can build a crust that’s strong enough to resist the sauce for a little while
You can put the sauce in places where it won’t destroy your crust
You can manage the cheese so it doesn’t slide off
It’s all about strategy
The Time I Almost Gave Up
I remember this one time I was testing chicken parmesan recipes in my kitchen
I had already failed at the wedding and I was obsessed with getting it right
I must have made it ten times in one week
My refrigerator was full of leftover chicken parmesan
I was eating it for breakfast, lunch, and dinner
I was giving it to my neighbors
I was giving it to my friends
People started avoiding me because they knew I was going to show up with another tray of chicken
But I couldn’t stop
Every time I thought I had it figured out, something went wrong
The crust would be perfect on one batch and then fall apart on the next
The sauce would be great on one try and then watery on the next
It was driving me crazy
I remember sitting in my kitchen at like two in the morning with a plate of failed chicken parmesan in front of me
Just staring at it
Wondering why I couldn’t get this right
And then I started paying attention to the little things
Not just the ingredients
But the techniques
The order of operations
The temperature of things
How long I let the chicken rest
How much oil I used
How I handled the breading
All these small details that most recipes ignore
And slowly, piece by piece, I started figuring it out
What Actually Makes the Difference
So let me tell you what I discovered
First of all, the breading
Most people use plain breadcrumbs or just panko
But if you mix panko with Italian breadcrumbs and grated parmesan, you get this amazing crust
The panko is light and airy
It gets incredibly crispy
The Italian breadcrumbs bring the seasoning
And the parmesan helps the breading brown and get that golden color
Each ingredient does something different
Together they create a crust that can actually hold up to sauce for a little while
But that’s just the start
The way you apply the breading matters just as much as what’s in it
You have to press it in
Really press it
Don’t just toss the chicken in the breadcrumbs and hope for the best
Press it down firmly
Flip it and press again
Make sure every surface is covered
If you see bare spots, pinch some breadcrumbs and pat them on
Those bare spots will be soggy later
I can’t tell you how many times I’ve seen people be gentle with their breading and then wonder why it falls off
You have to be aggressive
The breading needs to become part of the chicken, not just sit on top of it
Let Me Walk You Through It Step By Step
Alright, so you want to make this
I’m gonna assume you’re cooking for four people
Here’s how I do it
First, the chicken
I buy two large chicken breasts
Boneless, skinless
I look for ones that are roughly the same size
If one is huge and the other is small, they won’t cook evenly
The small one will be dry by the time the big one is done
I’ve made this mistake so many times
It’s frustrating
If you can’t find evenly sized ones, just butterfly them
That’s what I do
I take each breast and slice it horizontally like I’m opening a book
I don’t cut all the way through
I just cut until I can open it up
Then I have two thinner cutlets from each breast
Four cutlets total
Perfect for four people
Then I pound them
I put them between sheets of plastic wrap and use the bottom of a heavy pan
You don’t need a fancy meat mallet
I’ve used wine bottles before
The goal is to get them to the same thickness everywhere
About half an inch
If you don’t do this, the thin parts will overcook and dry out while you wait for the thick parts to finish
It’s a small step that makes a huge difference
After I pound them, I season both sides with salt and pepper
And I let them sit for about ten minutes
This lets the salt actually get into the meat
It seasons the chicken from the inside
Not just the surface
It’s called dry brining and it’s not fancy
It just works
Setting Up Your Breading Station
Now I set up my breading station
I use three shallow bowls
The first one has flour
The second has two eggs beaten with a tablespoon of water
The third has my breadcrumb mixture
Here’s what goes in the breadcrumb mixture
Half panko and half Italian breadcrumbs
Half a cup of grated parmesan
A teaspoon of garlic powder
A teaspoon of oregano
Half a teaspoon of red chili flakes
I crush the oregano between my fingers before I add it
This releases the oils and makes the oregano taste like something
If you just dump it in, it sits there being dry and dusty
The chili flakes are optional but I always add them
That tiny hit of heat cuts through all the cheese and makes the dish less heavy
You don’t taste heat
You just get this background warmth that balances everything
Now here’s a trick that saves so much mess
Use one hand for dry ingredients and one hand for wet
I use my left hand for the flour and breadcrumbs
I use my right hand for the egg wash
If you use the same hand for everything, you’ll end up with breadcrumb fingers
Half your coating will stick to your hand instead of the chicken
I’ve seen this happen so many times
It’s frustrating to watch
The Breading Process
The actual breading process goes like this
First, pat the chicken dry with a paper towel
If the chicken is wet, nothing will stick
The flour won’t adhere, the egg won’t coat evenly, and the breadcrumbs will fall off
Moisture is the enemy of breading
I can’t stress this enough
Then dredge the chicken in flour
Shake off the excess
You want a light coating, not a thick paste
Then dip it in the egg wash
Let the excess drip off
If it’s dripping, it’s too much
You just want a thin even coating
Then press it into the breadcrumb mixture
And when I say press, I mean press
Don’t just toss it around
Really push that breadcrumb into the chicken
Flip it and press again
Make sure every inch is covered
If you see bare spots, pinch some breadcrumbs and pat them on
Those bare spots will be soggy later
I promise you
After I bread each cutlet, I put them on a wire rack
Not a plate
A wire rack lets air circulate around the chicken
This keeps the breading from getting damp on the bottom
If you stack them on a plate, the bottom gets soft before you even start frying
It’s a small detail but it makes a difference
I let them sit on the rack for about fifteen minutes before frying
This gives the breadcrumbs time to adhere properly
They won’t fall off as easily in the pan
Frying Without the Drama
Now let’s talk about frying
I use a large skillet
I pour in enough oil to come about a quarter inch up the side of the pan
That’s usually enough for two or three cutlets at a time
I heat the oil over medium heat
Not high
Medium
If the oil is too hot, the outside burns before the inside cooks
If the oil is too cold, the chicken soaks up all that oil and turns into a greasy mess
To test if the oil is ready, I drop a pinch of the breadcrumb mixture in
If it sizzles immediately, it’s ready
If it sinks to the bottom without sizzling, the oil isn’t hot enough
Wait a little longer
If it burns instantly and turns black, the oil is too hot
Turn the heat down
When I add the chicken, I don’t crowd the pan
If they’re touching, they’ll steam each other
The steam makes the breading soft
You won’t get that crispy crust
So I do two cutlets at a time
It takes longer but the results are worth it
I fry them for three to four minutes per side
I know I said don’t flip them early but I’m going to say it again
Don’t flip them early
Wait until you see the edges turning golden brown
That’s your signal that the bottom is ready
When you flip them, the other side will take about the same time
The color you’re looking for is golden
Not dark brown
Dark brown means it’s starting to burn
Burnt breading tastes bitter and ruins the whole dish
When they’re done, I put them back on the wire rack
Not on paper towels
Paper towels trap steam and make the bottom soft
The wire rack lets air circulate around the whole cutlet
This keeps everything crispy
The Sauce Situation
Now let me talk about the sauce
This is where a lot of people overcomplicate things
You don’t need to make sauce from scratch
I use good quality jarred sauce most of the time
But I doctor it
Here’s what I do
I pour the sauce into a small pot and add a quartered onion and a whole carrot
I let it simmer for about fifteen minutes
Then I take out the onion and carrot
The onion adds sweetness
The carrot absorbs acidity
The sauce tastes like it’s been simmering all day but really it took ten minutes of effort
This is a caterer’s trick
You can feed a hundred people with doctored jarred sauce and nobody will know
If you want to make your own sauce, go ahead
I’ve done both
Honestly, if you use good quality jarred sauce and doctor it properly, most people can’t tell the difference
The sauce I use most often is Rao’s
It’s expensive but it’s worth it
If you can’t find that, look for anything that doesn’t have sugar added
You want the sauce to taste like tomatoes, not candy
Assembling the Dish
Preheat your oven to four hundred degrees
This is important
You need high heat to melt the cheese quickly without cooking the chicken further
Spread a thin layer of sauce on the bottom of a baking dish
This stops the chicken from sticking and adds flavor underneath
Then place the fried cutlets on top
Leave space between them
If they’re touching, they’ll trap steam
Steam makes the breading soft
You want them to have their own space
Then spoon sauce over the top
But here’s the rule
Only sauce the top
Don’t cover the sides
The sides are where the crunch lives
If sauce touches them, they go soft
I learned this the hard way
When I first started making this, I would drown the whole thing in sauce
I thought more sauce meant more flavor
But the sauce just made the breading mushy
Now I’m careful about it
A thin layer on top is all you need
Then sprinkle the mozzarella and parmesan over everything
I use low-moisture whole milk mozzarella
Not fresh mozzarella
Fresh mozzarella has too much water
It’ll make your crust wet
I buy a block and shred it myself
The pre-shredded stuff has potato starch on it
That starch stops it from melting properly
It’s worth the extra two minutes to shred it yourself
I promise
Baking and Finishing
Bake it for ten to twelve minutes
Just until the cheese is melted and bubbly
You’re not trying to cook the chicken anymore
You’re just melting the cheese
If I want the cheese browned on top, I turn on the broiler for the last two minutes
But I watch it carefully
The difference between golden and burnt is about thirty seconds
I’ve burned so many trays of this
You look away for one second and suddenly everything is black
When it’s done, I garnish with fresh basil
Not dried
Fresh basil adds brightness that cuts through all the richness
Without it, the dish can feel heavy
With it, everything comes together
It’s not just decoration
It’s part of the flavor
What Goes Wrong and How to Fix It
Let me tell you about the things that go wrong
Because they will go wrong
That’s just cooking
The crust is soggy
This is the most common problem
It happens because you used too much sauce or you let the chicken sit too long before baking
The sauce has water and that water goes straight into your breading
Next time, fry the chicken and let it cool completely
Assemble it right before you bake it
And only sauce the top
The chicken is dry
You overcooked it
Pull it out at one hundred sixty degrees
It’ll keep cooking while it rests
If you wait until it hits one hundred sixty five in the oven, it’ll be one hundred seventy by the time you eat it
That’s dry chicken
The breading fell off
You didn’t press it firmly enough or your chicken was wet
Pat it dry before you start
And really press that breadcrumb in
Don’t be gentle
The sauce is too acidic
Add a pinch of sugar and a drizzle of olive oil
Simmer it for a few minutes
It balances everything out
The oil splattered everywhere
Your chicken had moisture or your oil was too hot
Pat it dry and turn the heat down
The cheese slid off
Too much sauce
The cheese needs something to grip onto
Thin layer of sauce is all you need
The crust is pale and not crispy
Your oil wasn’t hot enough
Or you didn’t use enough oil
Make sure the oil sizzles when you add the chicken
Storing and Reheating
If you have leftovers, store them in the fridge for up to three days
The crust will soften
That’s just what happens
You can’t avoid it
To reheat, use the oven
Three hundred fifty degrees for about ten minutes
The microwave will make the crust rubbery
It works in a pinch but it’s not great
For freezing, this is where you get strategic
Freeze the breaded uncooked cutlets separately
Put them on a baking sheet with parchment paper
Freeze until solid, about two hours
Then transfer them to a freezer bag
They’ll last about three months
When you’re ready to cook them, don’t thaw them
Fry them straight from frozen
They’ll take a little longer, maybe five minutes per side
Then assemble and bake like normal
I do this for big events
I make dozens of cutlets ahead of time and freeze them
Then on the day, I just fry, assemble, and bake
It saves so much time
And the quality is almost as good as fresh
The Little Extras
Here are some things I’ve learned that aren’t in most recipes
Season every layer
Season the chicken
Season the flour
Season the breadcrumbs
Season the sauce
Every layer should have flavor
If only the chicken is seasoned, the breading will taste bland
Let the breaded cutlets rest
After you bread the chicken, let it sit on the wire rack for fifteen minutes before frying
This gives the breadcrumbs time to adhere
They won’t fall off as easily in the pan
Use a thermometer
I know it seems fussy but an instant-read thermometer takes the guesswork out
Chicken is done at one hundred sixty five
Pull it at one hundred sixty and let it rest
No more dry chicken
Double dredge for extra crunch
This is for when you really want to impress
Coat in flour, dip in egg, coat in breadcrumbs, dip in egg again, then breadcrumbs again
The crust becomes almost impossible to get soggy
I do this for events where the food has to sit out for a while
Save the pasta water
If you’re serving this with spaghetti, save some of the pasta water
Toss the pasta with olive oil, garlic, and a splash of the pasta water
The water helps the sauce stick to the pasta
It makes everything come together
What I Serve With It
Most of the time, I serve it with spaghetti
Just pasta tossed in olive oil and garlic
Nothing heavy
The chicken is already rich
A Caesar salad on the side
The tangy dressing cuts through all that cheese
Garlic bread is good but don’t go overboard
You want the chicken to be the star
If you’re doing low carb, zucchini noodles work
I’ve done it and it’s fine
Not the same but fine
Sometimes I serve it with roasted vegetables
Zucchini and bell peppers
They add color and freshness
One More Story
I want to tell you about the first time I got it right
I had been testing this recipe for weeks
I had failed so many times
I was so frustrated
But I kept going
And one night, I made a batch that was perfect
The crust was crispy
The chicken was juicy
The sauce was rich
The cheese was melted and golden
I remember sitting at my kitchen table eating it and thinking “finally”
I made that same batch again the next day to make sure it wasn’t luck
It wasn’t
I had actually figured it out
Now I make this dish for events all the time
I’ve served it at weddings with two hundred people
I’ve served it at small dinner parties
I’ve served it to my family on random weeknights
And every time, I think about all those failed batches
All those hours in the kitchen
All that frustration
It was worth it
Because now I can make this dish in my sleep
And I want you to be able to do the same
Final Thoughts
Look, Bubby, I could keep talking about this forever
I’ve been making it for fifteen years and I’m still learning
That’s the thing about cooking
You never really master it
You just get better at handling the disasters
I still have bad days
I still burn things
I still serve food that isn’t perfect
But I also have good days
Really good days where everything comes together
Days where people ask for seconds
Days where people ask for the recipe
Days where you feel like you actually know what you’re doing
Those days make up for all the mistakes
So go ahead and make this
Don’t be scared of messing up
You will mess up
That’s how you learn
I messed up for years before I figured out half of what I just told you
And I’m still figuring out the other half
The important thing is to keep cooking
Keep tasting
Keep paying attention
And don’t be afraid to fail
Because every failure teaches you something
That’s what makes you a real cook
Not the recipes you follow perfectly
But the mistakes you learn from
Now get in that kitchen and make some chicken parmesan
