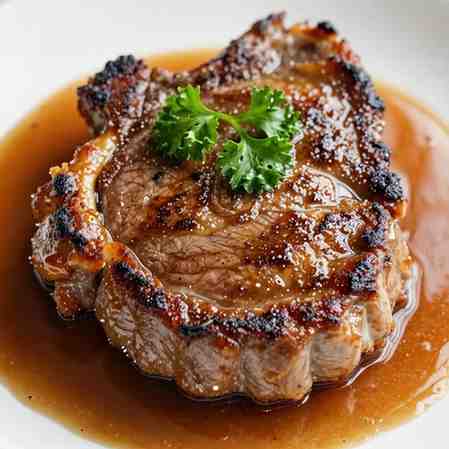
Perfect Pan-Fried Pork Chops Without Flour – Juicy & Tenderhttps://therecipehaven.com/pan-fried-pork-chops-without-flour/
Chapter 1: Picking Your Pork Chop – This Is Where It All Starts
Bone-In Versus Boneless – Let Me Settle This Once and For All
Alright Bobby let’s settle this right now, I’m a bone-in guy through and through, I know some of you are busy, you’re tired, you see that boneless chop at the supermarket and it looks so easy, slap it in a pan, flip it, done, I get it, I really do, but hear me out, that bone, that unassuming piece of calcium and marrow, is doing more work than you realize
It acts as an insulator, slowing down the cooking process around the center of the meat, which means the outside can get beautifully browned without the inside turning into shoe leather, the bone also adds flavor as that chop cooks, the marrow gently melts and releases into the surrounding meat, it’s subtle sure but you’ll taste the difference side by side
Boneless chops cook faster yes but they also dry out twice as fast, unless you’re absolutely dialed in on your timing and temperature you’re walking a tightrope, and I’d rather you stack the deck in your favor, so here’s my rule, bone-in, always, but if you absolutely must go boneless, buy them thick, at least an inch and a quarter, and drop your heat just a hair, we’ll talk more about that later
Thickness Is Everything – Don’t Let the Supermarket Fool You
Now let’s talk about those thin-cut chops, the ones that are maybe half an inch thick, they look cute and they cook fast and they’re cheap, and Bobby, they’re also the number one reason people say they hate pork chops
Here’s what happens, you put a thin chop in a hot pan, and by the time you get any kind of color on the outside, any kind of crust at all, the inside is already overcooked, dry, stringy, the moisture has all been driven out, you might as well be chewing on a sneaker, so do yourself a favor and hunt down chops that are at least one inch thick, ideally one and a half inches, you need that real estate, that buffer zone, that chance to develop a golden crunchy crust while the center stays juicy and just-cooked
Seek out a butcher if you can, they’ll cut them to whatever thickness you want, and a good butcher will also give you the inside scoop on where that pork came from and what the pigs were fed, that’s gold Bobby
Heritage Breeds and Marbling – When You Want to Get Fancy
If you really want to blow your own mind, look for heritage breed pork, Berkshire, Duroc, Red Wattle, these are pigs that were raised with care, usually pastured, with more fat marbled right into the muscle, and fat is flavor, fat is juiciness, fat is the difference between a good chop and a transcendent one
Yes they’re more expensive, but here’s the chef’s secret, you don’t have to cook them every night, save heritage chops for a weekend, for a dinner party, for a night when you want to prove to yourself just how good you can be, cook them the way I’m about to teach you and I promise you’ll never go back to commodity pork
Chapter 2: The Pre-Cook Ritual – Setting Yourself Up for Victory
Bringing the Chill Out – Temperature Is Everything
This might be the most overlooked step in home cooking Bobby, you open your fridge, pull out those chops, and within thirty seconds they’re in the pan, I’ve seen it a thousand times and I’ve done it myself when I’m in a hurry, but here’s the truth, cold meat and hot oil do not play nicely together
When that cold chop hits the pan, the exterior seizes up, the muscle fibers contract aggressively, squeezing out moisture before the heat even has a chance to work its magic, and you end up with a tough dry edge and a center that’s still fighting to catch up, so here’s the solution, give those chops twenty to thirty minutes on the counter, just resting, breathing, coming up to room temperature
You’re not going to give yourself food poisoning, that’s a myth by the way, in that short window the surface of the meat warms just enough to make a world of difference, and while they’re sitting you can prep your other ingredients, mince some garlic, pick some herbs, get your sides ready, it’s not wasted time, it’s productive waiting
The Drying Ritual – My Chef’s Obsession
Okay Bobby pay close attention here because this is the hill I will die on, before any seasoning, before any oil touches that pan, you need to dry those pork chops like your dinner depends on it, because it does
Grab a fresh sheet of paper towel, not the cheap thin stuff that shreds on contact, use the good absorbent kind, press it firmly onto the surface of the chop, both sides, around the bone, into any little crevices, you want that surface desperately dry, you should be able to run your finger across it and feel no slickness, just dry tacky meat
Why is this so important, because browning, that beautiful caramelized flavor-packed crust we’re chasing, only happens once all surface moisture has been driven off, water turns to steam at 212 degrees, but browning, the Maillard reaction, doesn’t really get going until around 300 degrees, so if there’s moisture on that surface it’s going to evaporate first and your pan temperature drops, you get steaming not searing, gray not golden
So dry, dry again, and when you think you’re done, dry one more time, I mean it
Seasoning Strategy – Salt Early, Pepper Late
Now this is where a lot of home cooks get it wrong, they season right before the pan, give it a quick pat, and in it goes, that’s fine, but fine isn’t what we’re after
I want you to season your chops and let them sit for at least ten minutes after drying, sprinkle a generous amount of kosher salt, don’t be shy, and a little freshly cracked black pepper, and let them rest on a wire rack over a baking sheet if you have one
What happens in those ten minutes, the salt draws out a tiny bit of moisture from the surface, that moisture dissolves the salt, and then through a process called osmosis that salty liquid gets reabsorbed back into the meat, it seasons the pork from the inside out, not just a salty crust but a deeply seasoned flavorful interior, that’s dry brining and it’s a game-changer
As for the pepper, I like to add half before cooking and half after, pepper can scorch and turn bitter in a hot pan, so give ’em a light dusting before and then finish with fresh cracked pepper right before serving for that bright aromatic pop
Chapter 3: The Pan – Your Most Important Tool in This Whole Operation
Cast Iron – My Eternal Love Affair
There are a lot of pans in my kitchen, stainless steel, carbon steel, non-stick for eggs and delicate fish, but for pork chops, cast iron, every single time
Why, because cast iron holds heat like nobody’s business, it’s heavy and dense and once it gets hot it stays hot, when you lay that pork chop in the pan, the pan doesn’t lose its temperature, it keeps on sizzling and browning and building that crust
It also develops a natural non-stick surface over time, what we call seasoning, a well-loved cast iron pan is a thing of beauty, it’s been with you through hundreds of meals, it knows your stove, it’s got character
If you don’t have cast iron, stainless steel is a solid second choice, just make sure it’s a heavy-bottomed pan, something with good heat retention, and avoid thin non-stick pans for this, they can’t get hot enough without degrading the coating and you’ll never get that deep dark sear you’re looking for
Heating the Pan – Patience Padawan
Now we’re getting into the heat Bobby and I’m gonna tell you something that might surprise you, you need to heat your pan for longer than you think
Set your pan over medium-high heat and let it sit there for a full three to four minutes, resist the urge to toss in the oil too early, the oil should go in right before the meat, not before the pan is ready
How do you know when it’s ready, the water test, flick a tiny drop of water into the pan, if it sizzles and evaporates immediately it’s not hot enough, you want it to bead up and dance across the surface like little ball bearings, that’s the Leidenfrost effect and that’s your green light
Once the pan is at that stage, add your oil, a neutral high-smoke-point oil, avocado, grapeseed, canola, or vegetable, swirl it gently to coat the bottom, it should shimmer and move like water, and that’s when you’re ready to introduce the pork
Why I Don’t Start with Butter – And When I Actually Add It
Here’s the mistake I made for years, I’d put butter in the pan from the beginning, it melts and foams and looks beautiful and then it burns, butter has milk solids and those solids scorch at high heat, you end up with bitter acrid notes and a blackened mess
So here’s my method, start with oil, cook the chops in that oil letting them develop that gorgeous crust, then in the last few minutes I drop the heat to medium and add a generous knob of butter along with garlic and herbs, the pan is cooler by then so the butter melts into a nutty golden pool without burning, and that’s when I start basting, scooping that fragrant butter over the top of the chops, that’s where the real flavor magic happens
Chapter 4: The Cooking Process – Step-by-Step Mastery in Action
Laying the Chops In – Always Away From Your Body
Alright the pan is hot, the oil is shimmering, the chops are seasoned and dried and ready, and here’s a little safety tip, lay those chops into the pan away from your body, angle the chop and let the far edge touch the pan first then gently lower the rest down, this prevents hot oil from splashing up toward your hand or your belly
And one more thing, don’t crowd the pan, if you have two big chops and they’re touching each other that’s too many, they need room to breathe, the moisture has to have somewhere to evaporate, if they’re packed in tight they’ll steam each other, and remember, we don’t do steam
If you need to, cook them in batches, keep the first batch warm in a low oven at 200 degrees while the second batch finishes, that’s not a failure, that’s smart cooking
The First Side – Four Minutes of Pure Discipline
Once those chops hit the pan, something very important happens, you leave them alone
I can’t tell you how many times I see people poke and prod and lift and peek within the first minute, I’ve done it too, the urge is overwhelming, but you have to resist
Set a timer for four minutes, maybe five if your chops are really thick, and during that time do not touch them, don’t move them, don’t lift a corner to check, just let them be
Why, because a proper crust takes time to form, and that crust is what will eventually release the chop from the pan naturally, if you try to move it too early it’ll stick and tear and leave half your beautiful browning stuck to the pan, wait until it releases on its own, you’ll feel it, when you nudge the chop gently with your spatula it should slide freely, that’s your sign
Look for a deep golden-brown color along the edges, that’s where the magic is happening
The Flip – And Introducing Butter and Herbs
When the first side is ready, flip those chops over with confidence, a firm quick motion, none of this tentative dropping-it-from-two-inches-high business, you want good contact with the pan
Now immediately lower the heat to medium, add your butter, about two tablespoons per chop, toss in a couple of smashed garlic cloves and a few sprigs of fresh thyme or rosemary, I also like to throw in a few whole black peppercorns for a subtle aromatic kick
Tilt the pan slightly so the butter pools at one side, it’ll foam and bubble, and using a spoon start basting, scooping that infused butter and pouring it right over the top of the chops, do this constantly for the next three to four minutes, this isn’t just a flavor move Bobby, the butter helps transfer heat to the top surface cooking the meat more evenly, plus it’s building this incredible herby garlicky layer of flavor that’ll make your kitchen smell like a dream
Checking Doneness – Trust Your Fingers and Your Tools
This is where it gets personal, some people swear by thermometers, others use the touch test, I use both
If you’ve got an instant-read thermometer, and I hope you do, pull the chops at 140 to 145 degrees internal temperature, the carryover cooking, the heat that continues to cook the meat after you pull it from the pan, will bring it up another five degrees, that lands you right at 145 to 150 which is USDA-safe and still incredibly juicy
But if you’re old school like me, use the palm test, relax your hand and press the fleshy part of your palm below your thumb, that’s what raw meat feels like, now make a fist but keep it loose, that’s rare, a tight fist is well-done, your perfectly cooked pork chop should feel somewhere between the loose fist and the tight one, firm but with a slight give, springy, not squishy
Chapter 5: Resting – The Unbreakable Rule That Makes All the Difference
Why You Must Let It Sit – No Exceptions
I’m going to sound like a broken record here but I don’t care, resting your pork chops is non-negotiable
When that chop comes out of the pan, the juices inside are boiling hot and moving fast, they’re agitated and excited and running wild, if you cut into that meat right away those juices are going to pour right out onto the cutting board, you’ll end up with a beautiful dry chop and a puddle of all the flavor you worked so hard to create
But if you let the chop rest for five to seven minutes, the muscle fibers relax, they stop squeezing, and those juices redistribute themselves evenly throughout the meat, when you finally cut in they stay put, the chop remains moist and tender and perfect
I usually rest my chops on a wire rack set over a baking sheet, that way air circulates around the whole chop keeping the crust crisp while it rests, if you rest them directly on a plate the bottom can get soggy from trapped steam, little details Bobby, little details
Chapter 6: The Pan Sauce – Turning Leftover Love Into Liquid Gold
Deglazing – Scrape Every Single Bit
You’ve pulled the chops out, the pan is still hot, and there clinging to the bottom are all those beautiful brown bits, the fond we call it in the industry, that’s pure concentrated pork flavor and caramelized garlic and herb essence
Don’t you dare wash that pan
Put it back on medium heat and pour in about half a cup of liquid, chicken stock is my go-to, white wine works beautifully, something dry and crisp, nothing sweet, even a splash of apple cider adds a lovely touch, as the liquid hits the hot pan it’ll bubble and steam, use a wooden spoon or spatula to scrape up every single one of those browned bits, they’ll dissolve right into the liquid turning it into a richly flavored base
Let that liquid bubble and reduce by about half, it’ll thicken slightly concentrating all that flavor
Mounting with Butter – The Chef’s Signature Finish
Now here’s the secret weapon, off the heat, and I mean off the heat, stir in a couple of tablespoons of cold butter cut into cubes, swirl it around gently until it melts and the sauce turns silky and glossy and luxurious, this is what we call mounting a sauce, the cold butter emulsifies into the liquid creating a texture that’s velvety and rich without being heavy
Finish with a squeeze of fresh lemon juice, just a little to cut through that richness, a sprinkle of chopped parsley, taste it, adjust the salt if needed
Now pour that sauce right over your rested pork chops, or serve it on the side in a little pitcher, either way you’ve just turned a simple pan-fried chop into something restaurant-worthy
Chapter 7: Fun Variations and Flavor Twists to Keep Things Interesting
Sweet and Spicy – Maple Chili Glaze
If you’re feeling adventurous Bobby, try this, after you pull the chops deglaze the pan with a quarter cup of chicken stock and two tablespoons of pure maple syrup, add a pinch of red pepper flakes, reduce until it coats the back of a spoon, stir in butter off the heat, and you get sweet and spicy and sticky and utterly addictive
Garlic Herb Butter – My Go-To Combo
This is the version I make when I’m showing off, before cooking mix softened butter with minced garlic and chopped thyme and rosemary and a little lemon zest, after the chops rest plop a big dollop of that compound butter right on top, as it melts it creates its own sauce, it’s unreal
Balsamic and Shallot
Deglaze with balsamic vinegar and finely minced shallots, the tanginess cuts through the pork’s richness beautifully, add a touch of honey if it’s too sharp, this one’s bold and sophisticated, perfect for date night
Chapter 8: What to Serve Alongside – Side Dish Harmony
Creamy Mashed Potatoes – A Classic for a Reason
You can’t go wrong with buttery smooth mashed potatoes, they’re a sponge for that pan sauce, I like to leave mine a little chunky with the skins on, adds texture and rusticity
Roasted Green Beans with Garlic
Toss fresh green beans with olive oil and salt and sliced garlic, roast at 425 degrees for about twelve to fifteen minutes until they’re blistered and tender, the bright snappy green balances the richness of the pork
Apple and Fennel Slaw
Thinly sliced fennel and crisp apple tossed with a little lemon juice and olive oil and salt, it’s fresh and crunchy and acidic, cuts through the fat like a dream
The Complete Ingredients List – All Measured and Ready to Go
Bobby here’s the deal, the ingredient list is short, intentionally short, that’s the whole point, we’re not hiding behind a bunch of pantry clutter, we’re letting the pork shine, but every single ingredient on this list matters so I want you to treat them with respect
For the Pork Chops:
| Ingredient | Quantity | Notes |
|---|---|---|
| Bone-in pork chops | 2 large chops or 4 if they’re smaller | 1 to 1½ inches thick, heritage breed if you can find them |
| Kosher salt | 1 to 1½ teaspoons per chop depending on size | Diamond Crystal preferred, if using table salt use half the amount |
| Freshly cracked black pepper | ½ teaspoon per chop | Crack it coarse, fresh is non-negotiable |
| Neutral cooking oil | 2 tablespoons | Avocado, grapeseed, canola, or vegetable, high smoke point is key |
For the Basting Butter:
| Ingredient | Quantity | Notes |
|---|---|---|
| Unsalted butter | 4 tablespoons or half a stick | Cut into 1-tablespoon pieces, cold is fine |
| Garlic cloves | 3 to 4 large | Smashed with the flat of your knife, skin on or off your call |
| Fresh thyme sprigs | 4 to 5 sprigs | Rosemary also works beautifully |
| Fresh rosemary sprig optional | 1 sprig | Adds a piney woodsy note if you’re feeling it |
For the Pan Sauce – Optional but Highly Recommended:
| Ingredient | Quantity | Notes |
|---|---|---|
| Chicken stock or dry white wine | ½ cup | Stock gives savory depth, wine gives acidity and complexity |
| Unsalted butter for mounting | 2 tablespoons | Cold and cubed, this is for the finish |
| Fresh lemon juice | 1 to 2 teaspoons | To taste, fresh only, bottled stuff is a crime |
| Fresh parsley | 1 tablespoon | Chopped fine, for garnish and freshness |
| Salt and pepper | To taste | Adjust at the very end |
For Serving – Optional but Lovely:
| Ingredient | Quantity | Notes |
|---|---|---|
| Flaky sea salt | A pinch | Maldon or similar, for that final sparkling crunch |
| Lemon wedges | 2 to 4 | For squeezing over at the table |
The Equipment – What You’ll Need in Your Kitchen
| Tool | Why It Matters |
|---|---|
| Cast iron skillet or heavy-bottomed stainless steel | Even heat, great sear, natural non-stick properties |
| Paper towels the good sturdy kind | Critical for drying the meat properly |
| Tongs | For flipping without poking holes in the meat |
| Instant-read meat thermometer | Takes the guesswork out, I love my Thermapen |
| Wooden spoon or spatula | For scraping up fond and basting |
| Wire rack set over baking sheet | For resting, keeps the crust crisp |
| Small saucepan if making extra sauce | Not essential but helpful for larger portions |
The Step-by-Step Procedure – From Start to Finish
Alright Bobby roll up your sleeves, this is the exact sequence I follow every single time, I’ve broken it down into clear steps so you can check them off as you go, read through the whole thing once before you start, trust me it helps
Step 1: Remove Chops from Fridge and Start the Dry Brine
Take your pork chops out of the refrigerator about 30 to 40 minutes before you plan to cook, remove them from any packaging and place them on a plate or cutting board lined with paper towels, I know you’re eager but cold pork is not your friend, let those chops come up to room temperature
Now pat the chops completely dry with fresh paper towels, press firmly, both sides, around the bone, into any little crevices, if you see moisture on that towel keep going, the surface should feel tacky and dry to the touch, I’m gonna say this one more time because I mean it, dry meat equals brown meat, wet meat equals sad gray steamed pork, you choose
Season both sides of each chop generously with kosher salt and freshly cracked black pepper, use about one teaspoon of salt per chop if they’re large, don’t be shy, rub the seasoning into the meat with your fingertips so it adheres, that salt is going to do its magic over the next ten to fifteen minutes, it’ll draw out a little moisture and dissolve and then get sucked back into the meat, that’s flavor penetration, that’s dry brining, don’t rush it
Place the seasoned chops on a wire rack over a baking sheet if you have one, if not just leave them on a plate, let them sit uncovered at room temperature for 15 to 20 minutes, I like the wire rack because it lets air circulate around the whole chop drying the surface even further, but don’t stress if you don’t have one, just don’t cover them with plastic wrap, we want that surface to stay dry
Step 2: Prep Your Aromatics and Butter
While the chops are resting, smash 3 to 4 garlic cloves with the flat side of your chef’s knife, you want them cracked open not minced, the skin can stay on, it’ll peel off easily after cooking
Pick the leaves off 4 to 5 sprigs of fresh thyme, you can leave them whole or give them a rough chop, if using rosemary strip the needles from one sprig and chop them finely, rosemary is stronger so go easy
Cut 4 tablespoons of unsalted butter into 4 individual pats and keep them cold in the fridge until you need them, this matters for the basting process
Measure out your half cup of chicken stock or white wine and have it ready next to the stove, chop your parsley and cut your lemon wedges, have everything within arm’s reach before you turn on the heat, this is called mise en place Bobby, French for everything in its place, it’s the difference between a calm enjoyable cooking experience and a frantic panicky mess, do it, you’ll thank me
Step 3: Heat the Pan to the Perfect Temperature
Place your cast iron skillet or heavy-bottomed stainless steel pan over medium-high heat and let it sit there for a full 3 to 4 minutes, don’t add any oil yet, I know it feels like you’re wasting time but you’re not, that pan needs to be thoroughly and evenly heated, a cold spot in the middle will ruin your sear
Test the heat by flicking a tiny drop of water into the pan, if it evaporates instantly it’s not ready, if it beads up and skates across the surface like a little marble you’re there, that’s the Leidenfrost effect and it’s your green light
Add 2 tablespoons of your neutral cooking oil to the pan and swirl it around gently to coat the bottom, the oil should shimmer and flow like water, thin and glossy, if it’s smoking heavily your pan is too hot, remove it from the heat for 10 seconds to cool down slightly, we’re using neutral oil here because we need high heat without burning, butter would scorch and olive oil would smoke out your whole kitchen, save them for later
Step 4: Lay the Chops In and Leave Them Alone
Carefully lay the pork chops into the hot pan, placing them down away from your body, use tongs and angle the chop so the far edge touches the oil first then gently lower the rest, this prevents hot oil from splashing up at you, listen to that sizzle Bobby, that’s the sound of a proper sear, if it’s quiet your pan wasn’t hot enough, live and learn but don’t make that mistake twice
Ensure there’s at least an inch of space between each chop, if they’re touching they’ll steam each other, if you’re cooking more than two large chops work in batches, I know you want to get it all done at once but crowding the pan is the fastest way to ruin your dinner, one batch now, one batch later, keep the first batch warm in a 200 degree oven while you finish the rest
Now here’s the hard part, leave them alone, set a timer for 4 to 5 minutes depending on thickness, do not poke or prod or lift or peek, resist the urge, that crust is forming molecule by molecule, every time you lift a chop you lose heat and disrupt the process, trust the timer, trust the pan
After 4 to 5 minutes gently nudge one chop with your tongs, if it slides freely without sticking it’s ready to flip, if it clings give it another 30 seconds and try again
Step 5: Flip and Start Basting Like a Pro
Flip each chop over with a confident quick motion, you want full contact with the pan, don’t be timid, hesitation leads to uneven searing, commit to the flip
Immediately reduce the heat to medium and drop in your 4 tablespoons of cold butter distributing them around the pan, add the smashed garlic cloves and your fresh thyme and rosemary if using, the butter will foam and sizzle, that’s normal, lowering the heat keeps the butter from burning while still giving you the fat you need for basting
Tilt the pan slightly so the butter pools at one edge and using a large spoon start basting, scoop up that garlic-herb butter and pour it continuously over the top of the chops, do this for the next 3 to 4 minutes, this is the money shot Bobby, that butter picks up the garlic and thyme and turns nutty and fragrant and showers the chops with layer after layer of flavor, you’re not just cooking, you’re painting
Cook the second side until the chops are golden-brown and the internal temperature reaches 140 to 145 degrees, for 1-inch chops this takes about 4 to 5 minutes, for 1½-inch chops closer to 6 minutes, use your instant-read thermometer to be sure, I used to be a feel-it-with-your-finger guy and I still am, but I also use a thermometer now, pride doesn’t put juicy pork on the table, accuracy does
Step 6: Rest the Chops – Do Not Skip This Step
Transfer the cooked chops to a wire rack set over a baking sheet, do not put them on a plate, the bottom will get soggy from trapped steam, pour any pan butter over the top, that butter that was basting, pour it right over the chops, it’ll soak in a little and keep everything lush while they rest
Let the chops rest for 5 to 7 minutes, do not cut into them, do not slice them, do not even touch them, just let them sit, I’ve said it before and I’ll say it again, resting is non-negotiable, those juices are settling down and redistributing and doing their job, a restless cook makes dry meat, be patient
Step 7: Make the Pan Sauce – Optional
While the chops rest, place the same skillet back over medium heat, the butter and aromatics are still in there, lots of flavor left
Pour in half a cup of chicken stock or dry white wine, the liquid will sizzle and bubble immediately, using a wooden spoon or spatula scrape up every single browned bit stuck to the bottom of the pan, that fond, those brown bits, is liquid flavor, it’s the concentrated essence of everything we just cooked, don’t leave a single bit behind
Let the liquid bubble and reduce by about half, roughly 2 to 3 minutes, it should thicken slightly and darken in color
Remove the pan from the heat entirely and add the 2 tablespoons of cold cubed butter, swirl it around until it melts completely, the sauce will turn glossy and velvety, this is called mounting the sauce, the cold butter emulsifies into the liquid creating that restaurant-quality sheen, do it off the heat so the butter doesn’t break
Stir in 1 to 2 teaspoons of fresh lemon juice, taste the sauce, adjust with salt and pepper if needed, add your chopped parsley at the very end, that lemon juice is a bright acidic counterpoint to all that richness, it brings balance, don’t skip it
Step 8: Plate and Serve with Pride
Place each rested pork chop on a warmed plate or serving platter, spoon the pan sauce generously over the top, sprinkle with a pinch of flaky sea salt for that final crunch, garnish with additional fresh herbs and lemon wedges
Bobby this is your moment, you’ve done everything right, the crust is golden, the meat is tender, the sauce is silky, take a second to admire your work before you dig in
Serve immediately with mashed potatoes or roasted vegetables or a crisp salad or whatever side you love, pour yourself a glass of something nice, and enjoy every single bite, pork chops wait for no one and neither does joy, eat this while it’s hot while the butter is still glistening while the aroma fills the room, that’s the payoff for all that effort
Quick-Reference Recipe Card – For Your Fridge
Bobby I know sometimes you just want the stripped-down version, so here it is, a cheat sheet you can tape to your cabinet while you cook, no stories, no philosophy, just the bones
Ingredients:
- 2 bone-in pork chops, 1 to 1½ inches thick
- 1 to 1½ teaspoons kosher salt per chop
- ½ teaspoon black pepper per chop
- 2 tablespoons neutral oil, avocado, grapeseed, or canola
- 4 tablespoons unsalted butter
- 3 to 4 garlic cloves smashed
- 4 to 5 thyme sprigs
- ½ cup chicken stock or white wine for the sauce
- 2 tablespoons cold butter for the sauce
- 1 to 2 teaspoons fresh lemon juice for the sauce
- Fresh parsley and lemon wedges for garnish
Procedure:
- Remove chops from fridge 30 to 40 minutes before cooking, pat completely dry
- Season generously with salt and pepper, let rest 15 to 20 minutes
- Heat cast iron pan over medium-high for 3 to 4 minutes, add oil and swirl
- Place chops in pan away from you, cook 4 to 5 minutes without touching
- Flip when they release easily, reduce heat to medium, add butter, garlic, and thyme
- Baste continuously for 4 to 5 minutes until internal temp hits 140 to 145 degrees
- Rest chops on wire rack for 5 to 7 minutes
- For sauce, deglaze pan with stock or wine, scrape up fond, reduce by half, remove from heat, whisk in cold butter, add lemon juice, and season
- Plate chops, spoon sauce over, garnish, and serve immediately
My Final Words to You Bobby
There it is, the full monty, ingredients and equipment and procedure and all the chef wisdom I could pack into one article, and now it’s flowing the way it should, like a conversation, like we’re standing shoulder to shoulder at the stove
I want you to know something, this recipe isn’t just about pork chops, it’s about confidence, it’s about trusting yourself to cook simply and cook well, it’s about understanding that the best food doesn’t need to be complicated, it just needs to be respected
The first time I made this without flour I was terrified, I thought I was breaking some sacred rule, but now it’s my go-to, it’s the dish I make when I want to remind myself why I fell in love with cooking in the first place.
