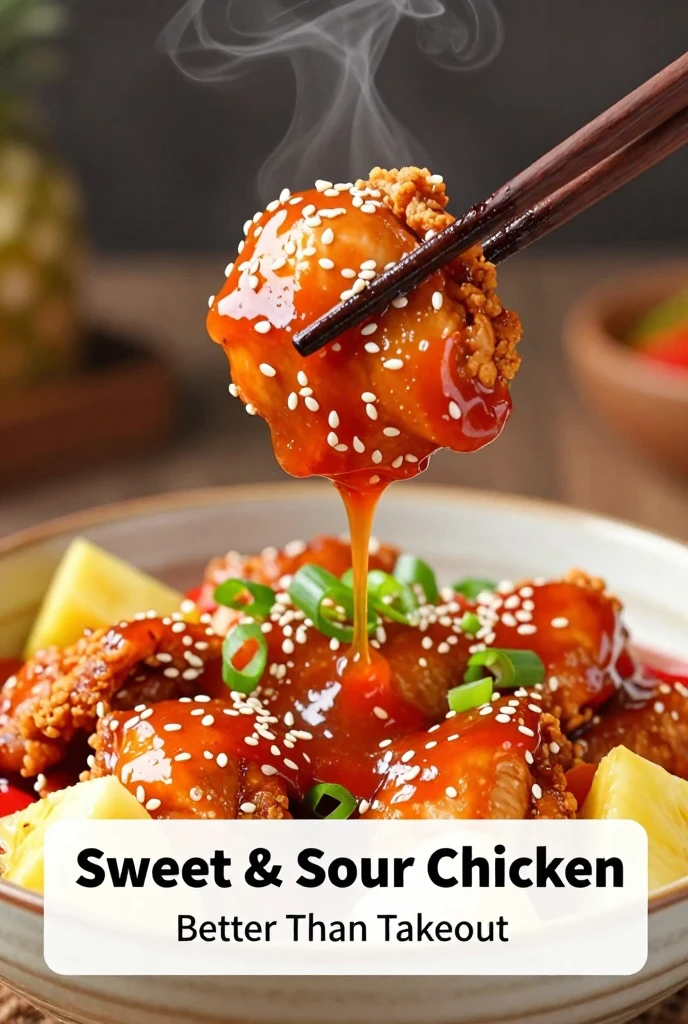
Sweet and Sour Chicken Entree to Enjoy the Nostalgiahttps://www.facebook.com/groups/201433887948470/posts/567016328056889/
I was seven years old the first time I tasted sweet and sour chicken
My parents brought home those white takeout boxes with the metal handles
You know exactly what I’m talking about
My brother and I sat on the kitchen floor because we were weird kids who hated chairs
My mom opened the box and this sweet tangy smell filled the whole kitchen
I took one bite and my little brain just stopped working
What was this magic?
How could something be sweet and sour at the same time?
And why was the chicken still crispy even though it was covered in sauce?
I didn’t know it then
But that moment changed my whole life
Now I’m a chef
Been cooking for over fifteen years
And I still make sweet and sour chicken at least once a month
My husband begs me for it
My friends text me asking when I’m making it again
My clients put it on their event menus
There’s something about this dish that just hits different
Why I Keep Coming Back To This Dish
I’ve made a lot of fancy food over the years
Sauces that take three days to make
Plates that look like they belong in a museum
Things with names nobody can pronounce
But you know what people actually want?
Sweet and sour chicken
Every time
I think it’s the nostalgia
People remember eating this as kids
They remember Friday nights and takeout boxes
They remember being happy
When I make it for them, I’m not just feeding them
I’m taking them back to that feeling
That’s powerful stuff
Where This Dish Actually Comes From
Most people don’t know this
But sweet and sour chicken started in Cantonese cuisine
The original version used pork
Not chicken
Pork was what they had in southern China
When Chinese immigrants came to America, they had to adapt
Chicken was cheaper and easier to find
Americans were used to eating chicken
So the dish changed
Now it’s everywhere
Fancy restaurants, food courts, takeout spots
Everyone has their version
But the best version?
The one you make yourself
With ingredients you trust
And love you can taste
Let’s Talk About The Sauce
The sauce is everything
Get this right and you’re golden
Get it wrong and nothing else matters
The Sweet Part
Brown sugar
Not white
Brown sugar has molasses in it
That molasses gives the sauce depth
It’s not just sweet
It’s caramel-y and slightly smoky
Makes it taste like it’s been cooking for hours
Even though it only takes minutes
How much?
Half a cup for four servings
But taste as you go
Start with less and add more if you want
No brown sugar?
Use white sugar
But add a little honey or maple syrup
That’ll give you some of that depth back
The Sour Part
Rice vinegar
It’s milder than white vinegar
Less sharp, less in your face
If you only have white vinegar?
Use it
It’ll work fine
Apple cider vinegar?
I actually like it
Adds fruitiness that pairs well with pineapple
The ratio
Roughly equal parts sweet and sour
But tweak it to your taste
More sweet for a milder sauce
More sour for a tangier kick
The Umami Punch
Soy sauce
This makes the dish savory
Without it, the sauce is just sweet and sour
One-dimensional and boring
Light vs dark
I use light soy sauce
Dark is thicker and sweeter
You could use it, but the sauce will be darker
Light keeps it bright and vibrant
The Color And Body
Ketchup
I know it sounds weird
But trust me on this
Ketchup gives that beautiful red-orange color
And adds subtle tomato sweetness
Why ketchup works
It’s already sweet and tangy
Tomato flavor blends perfectly
Helps thicken the sauce naturally
No ketchup?
Tomato paste with a little sugar
But honestly, just get ketchup
It’s worth it
The Fruit
Pineapple chunks with their juice
Non-negotiable
The juice becomes part of the sauce
The chunks give you bursts of sweetness
Fresh or canned?
I love fresh pineapple
But for this dish, canned is perfect
The juice is already there
Sweetness is consistent
Less work
Using fresh?
Add a little water
Fresh has less liquid than canned
Might need more sugar
Canned is sweeter
The Chicken
This is where things can go wrong
White Or Dark?
I use chicken breast
Leaner, what people expect
But thighs work great too
More flavor, juicier
Harder to dry out
Thighs
More fat means more flavor
Usually cheaper
Breasts
Fewer calories
What people expect
Absorb sauce beautifully
My choice
Boneless, skinless chicken breasts
I pound them slightly before cutting
Makes them more tender and even
Cutting It Right
Cut into bite-sized pieces
About 1-inch cubes
Small enough to cook quickly
Big enough to stay juicy
Too small?
They’ll overcook
Too big?
Won’t cook through properly
Aim for that 1-inch sweet spot
Pro tip
Cut against the grain
Makes the meat more tender
Look at the lines in the chicken
Cut perpendicular to them
The Secret To Crispy Chicken
Cornstarch
Don’t skip it
That light coating gives you that shatteringly crisp exterior
Why cornstarch works
Absorbs moisture
Creates a barrier that crisps up in hot oil
Gluten-free bonus
The double coating method
Season chicken with salt and pepper
Dredge in cornstarch
Dip in beaten egg
Dredge again in cornstarch
That double coating is the restaurant secret
Let it rest
After coating, let the chicken rest 5-10 minutes
Cornstarch absorbs and sticks better
The Vegetables
Bell peppers are classic
Red and green together look gorgeous
Use whatever colors you like
They all work
Why bell peppers
Hold their texture
Add crunch and color
Naturally sweet
Cutting them
Chunks about 1.5 inches
Same size as the chicken
Balanced bite
Onion
White or yellow
Chunks about the same size as the chicken
Adds sweetness as it cooks down
Red onion
More visual appeal
Nice pop of purple
Milder than white onion
Pineapple
Again, canned or fresh
Canned is easier
Fresh is better if you have it
For this dish, canned is fine
My Cooking Process
Here’s exactly how I make it
Step 1: Prep Everything First
I can’t stress this enough
Have everything ready before you turn on the stove
Once you start cooking, things move fast
No time to chop garlic or measure vinegar
My prep list
Chicken cut and seasoned
Cornstarch in a shallow bowl
Eggs beaten in another bowl
Peppers and onion chopped
Pineapple drained, juice saved
Sauce ingredients measured and mixed
Rice cooking or ready
Garlic and ginger minced
Why this matters
Cooking should be fun, not stressful
When everything is prepped, you can actually enjoy it
Step 2: Coat And Fry
Heat oil in a wok or deep skillet
About 1/2 inch of oil
Medium-high heat
Test with a wooden spoon
If bubbles form around it, you’re ready
The coating process
Dip chicken in cornstarch
Then into beaten egg
Then back into cornstarch
Every piece well coated
Shake off excess
Frying in batches
Don’t crowd the pan
Too much chicken and the oil temperature drops
Soggy chicken instead of crispy
Cook each batch 3-4 minutes
Until golden brown and crispy
Remove and drain on paper towels or wire rack
The double fry trick
Fry the chicken once
Let it rest for a minute
Fry again for 30 seconds to a minute
Extra crispiness that holds up even with sauce
Step 3: Make The Sauce
Remove most of the oil from the pan
Leave about a tablespoon
Start with aromatics
Add minced garlic and ginger
Cook 30 seconds until fragrant
You’ll smell it right away
That’s when you know it’s ready
Add vegetables
Toss in bell peppers and onion
Cook 2-3 minutes
Tender-crisp, not mushy
Build the sauce
Add ketchup, vinegar, brown sugar, soy sauce
Stir together
Pour in pineapple juice
Bring to a gentle simmer
Thicken it up
Mix cornstarch with cold water
Make a slurry
Pour into sauce while stirring
Watch it transform
Thin liquid becomes glossy, thick sauce
Add pineapple chunks
Stir gently
Let them warm through
Step 4: Bring It Together
Add crispy chicken back into the pan
Toss gently to coat every piece
Don’t break the crispy coating
Cook 2-3 more minutes
Everything hot and glazed
Step 5: Serve
Transfer to serving dish
Garnish with sliced green onions
Sesame seeds if you’re feeling fancy
Serve immediately over steamed jasmine rice
What I’ve Learned From Making This For Events
I’ve made this for everything
Weddings, birthdays, corporate lunches, family dinners
Making it ahead
Fry chicken ahead of time
Keep in the oven on a wire rack
Don’t cover it or it’ll get soggy
Sauce in advance
Store in the fridge up to 3 days
Reheat and add chicken just before serving
Batch cooking
Scales up well
Cook in batches
Keep everything warm while you finish
Buffet service
Keep sauce and chicken separate
Let people combine on their plates
Keeps chicken crispy
Common Problems And Fixes
I’ve made every mistake
So you don’t have to
Sauce too sweet
Add more vinegar
A tablespoon at a time
Taste as you go
Sauce too sour
Add more sugar or ketchup
Sweetness balances the tang
Sauce too thin
Simmer longer
Or add more cornstarch slurry
Add slowly, too much makes glue
Chicken not crispy
Oil wasn’t hot enough
Or you crowded the pan
Or didn’t double fry
Coating fell off
Didn’t let coated chicken rest
Give it 5-10 minutes before frying
Chicken dry
Overcooked
Cook just until golden and cooked through
Sauce adds moisture
Vegetables mushy
Overcooked
They should still have crunch
Healthier Swaps
Sometimes you want comfort food without the guilt
Instead of deep frying
Bake at 425°F for 20-25 minutes
Spray with oil for crispiness
Or use an air fryer
Not the same, but close
Use less sugar
Cut the sugar back
Let pineapple provide the sweetness
You’d be surprised how much flavor comes from the fruit
Add more vegetables
Carrots, snap peas, broccoli
More color, nutrients, crunch
Skip white rice
Brown rice for more fiber
Cauliflower rice if watching carbs
Serving Suggestions
Classic
Over steamed jasmine rice
With stir-fried vegetables on the side
Fun
In lettuce cups
Use chicken mixture as filling
For a crowd
Set up a sweet and sour station
People build their own plates
Storage And Reheating
Fridge
3-4 days in an airtight container
Flavors get better overnight
Reheating
Stovetop is best
Medium heat with a splash of water or broth
Microwave works too
But chicken won’t be as crispy
Freezing
You can freeze it
But the chicken won’t be as crispy when reheated
If you freeze it, freeze sauce and chicken separately
One Last Story
Last year I made this for my niece’s birthday
She’s picky
Really picky
The kind of kid who wants plain pasta and nothing else
She took one look at this colorful dish and actually asked for it
Ate two servings
Her mom was shocked
That’s the power of this food
It’s not just delicious
It’s approachable
It’s happy
It brings people together
And that’s what cooking is all about
